

Configuring CloudFlare LoadBalancer


In this post we will configure a external loadbalancer with cloudflare option. This can be in hand if your cloud provider do not offer you a loadbalancer.
In its minimal configuration it can cost you as little as $5 per month, and gets the job done decently for 2 origins (servers)
Lets get started.
First enable the feature in Traffic > Load Balancing
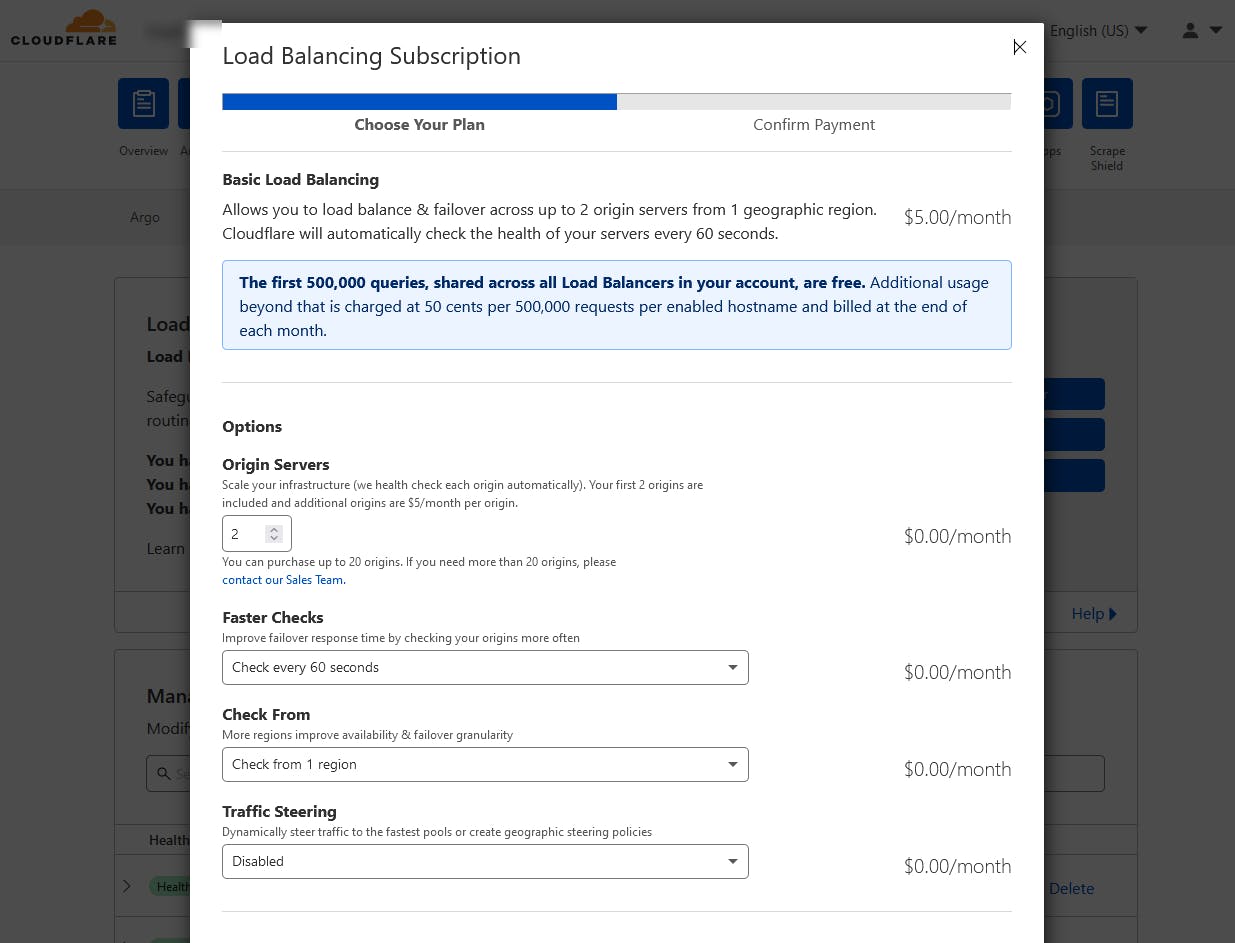
Origin servers is the number of servers you will route traffic to and create health checks. For me two is enough
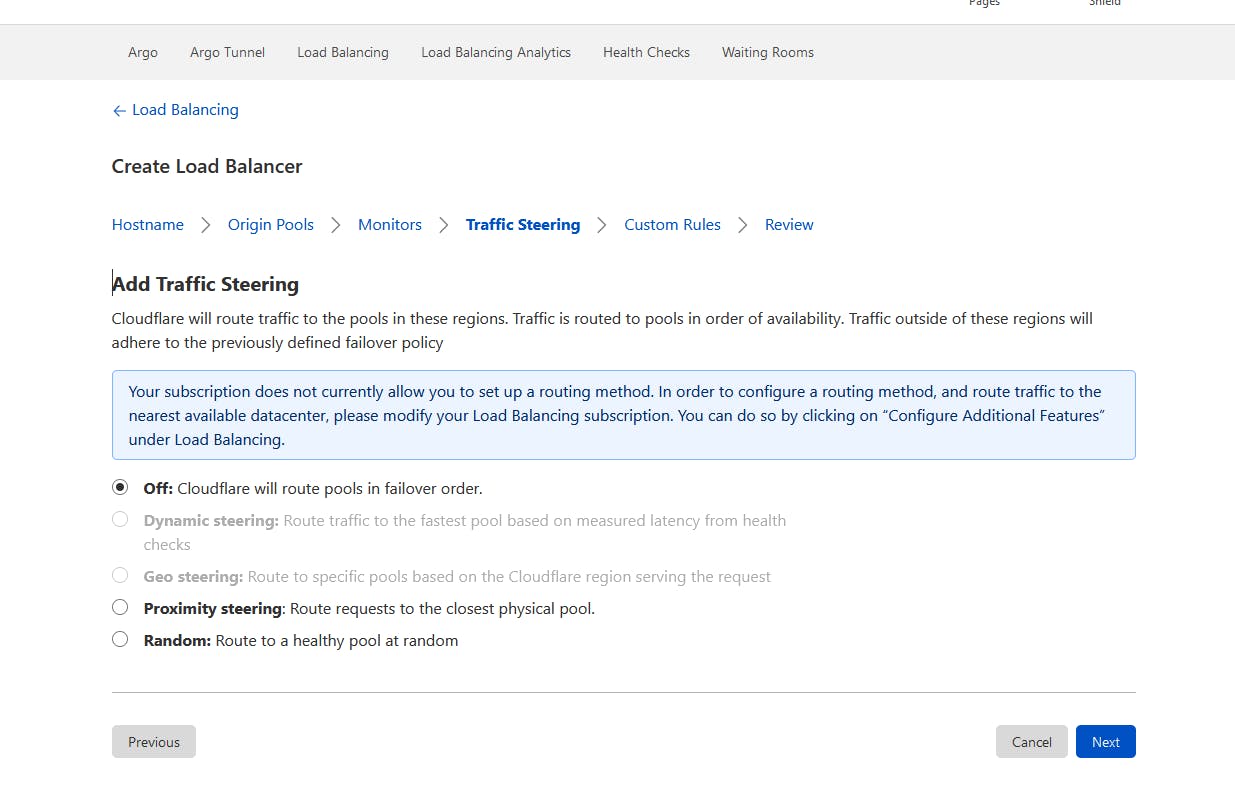
We are not doing any advanced traffic steering (routing)
After payment, lest create the load balancer. You can create 20 loadbalancers (each load balancer is associated with a domain, and can be a * domain). Don't worry, as long as you use the same origin and traffic steering its already included in your monthly bill.
The first thing you will need is to enter your domain:
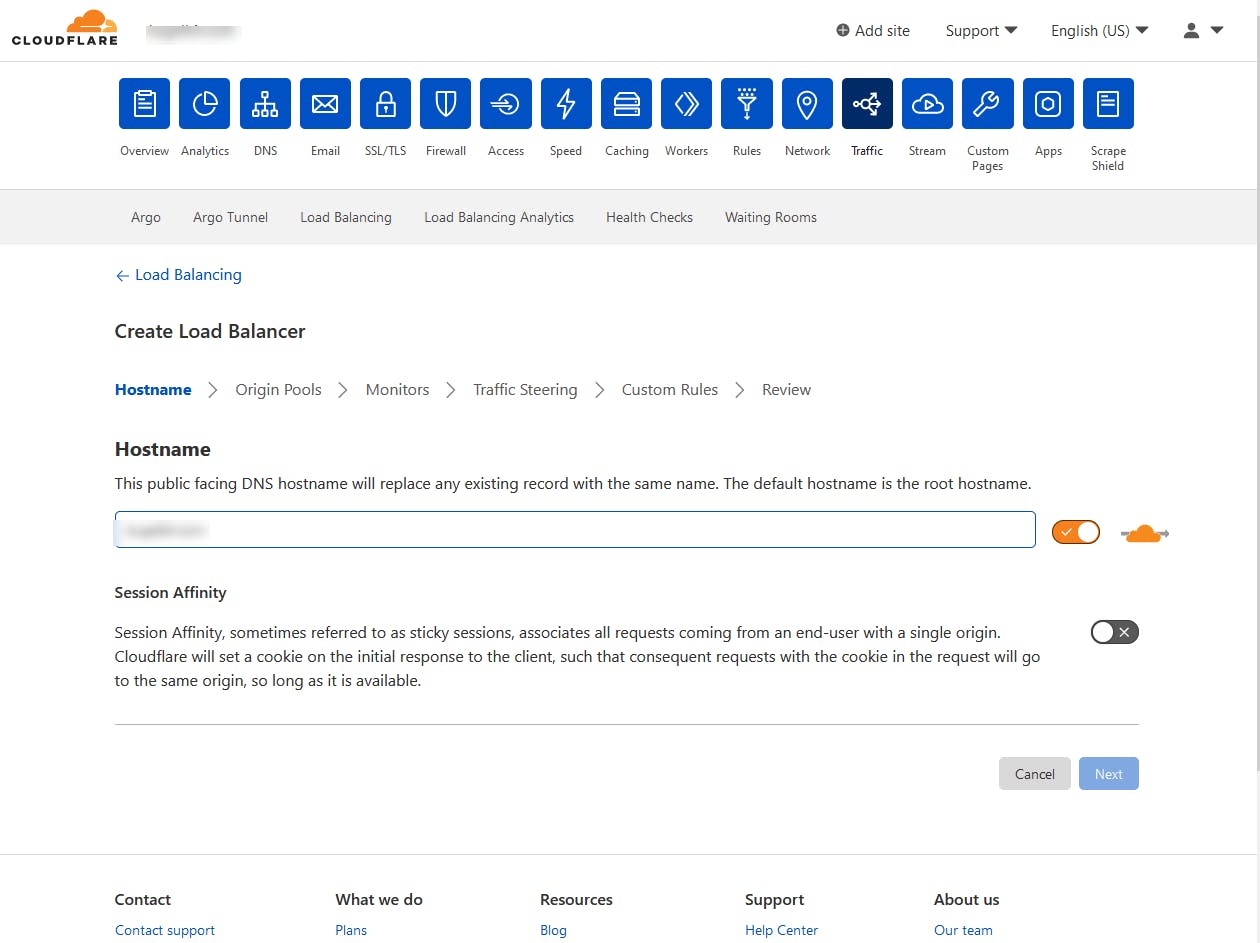
This orange button mark is if you want proxy acceleration thought CDN network, you can leave it checked
Next add a new pool
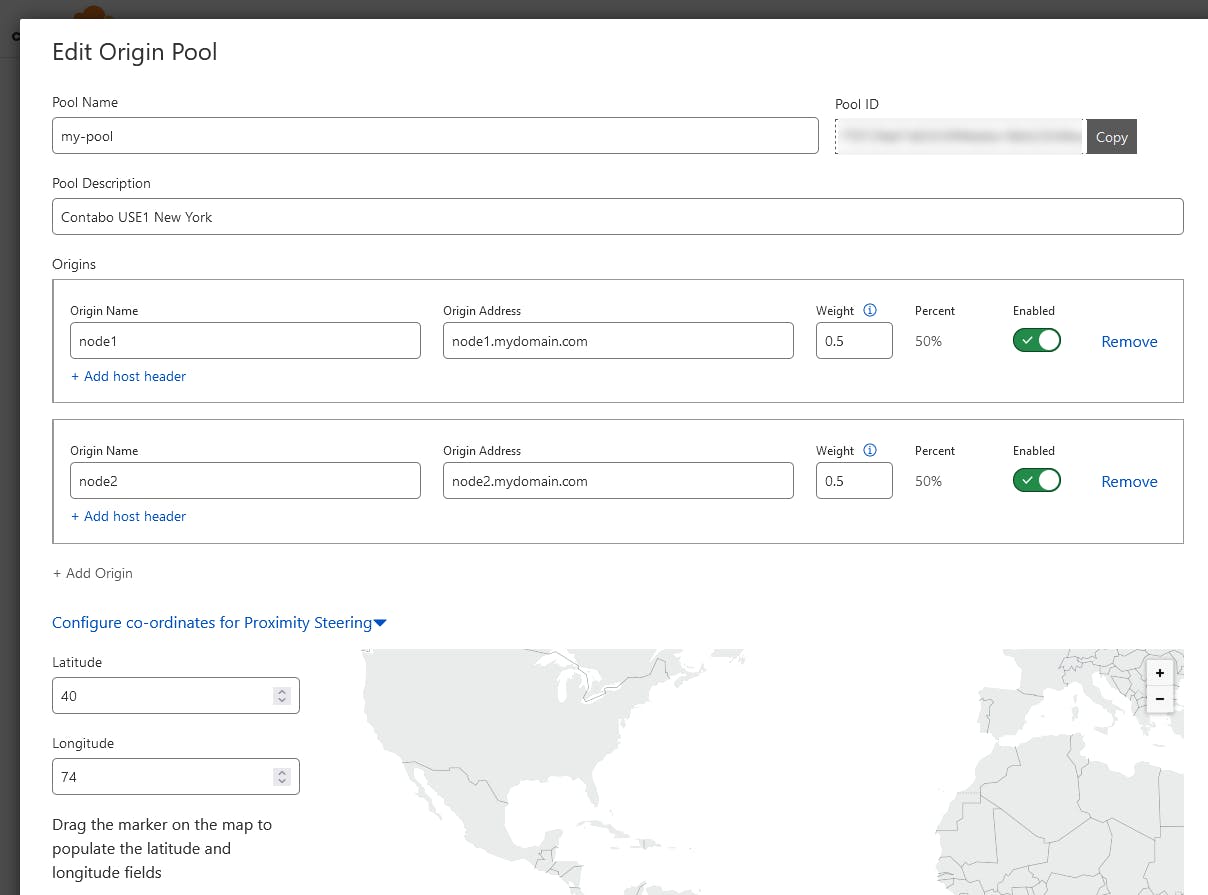
Add nodes and select the weight of each node. To allow 50% of traffic to each node put 0.5 as the weight
Next add a health check origin and a email to receive notifications:
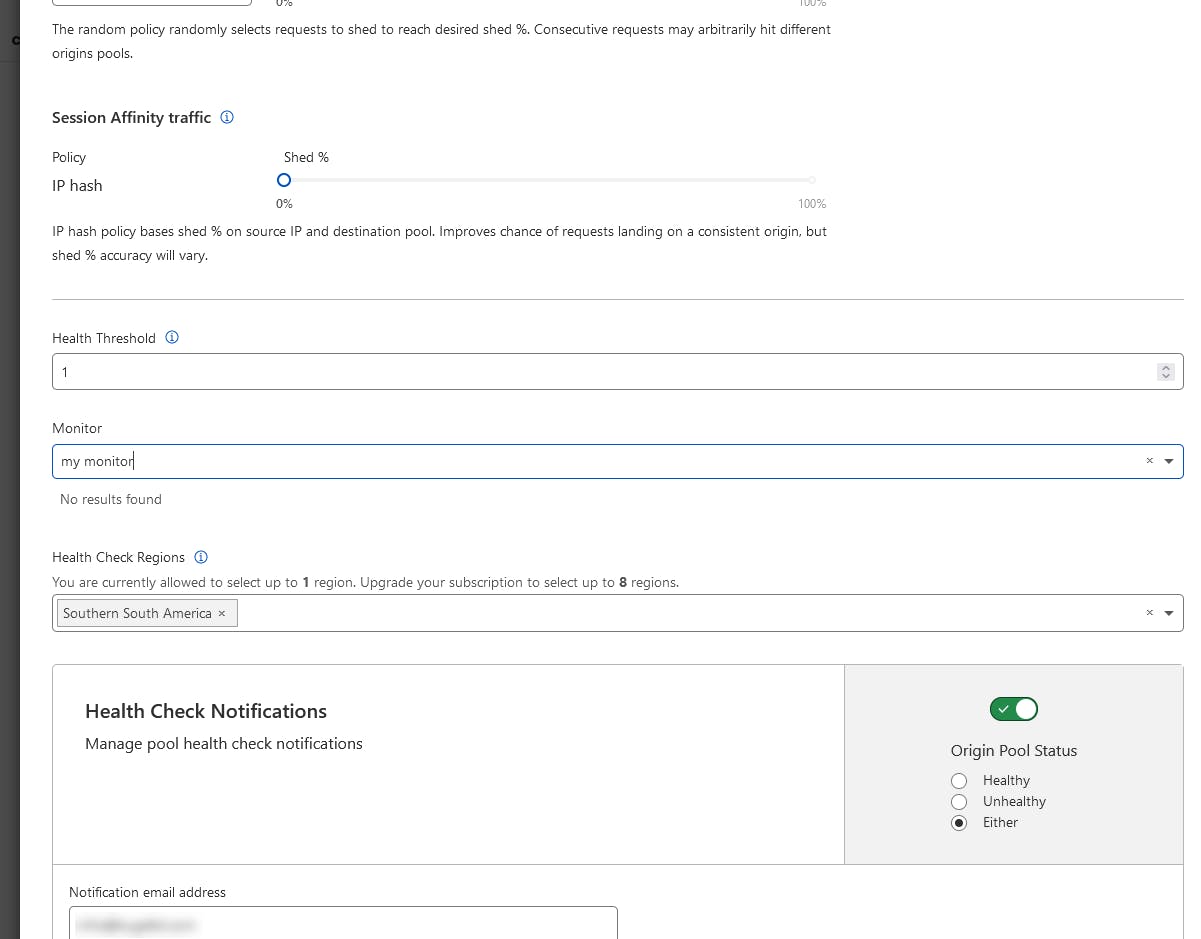
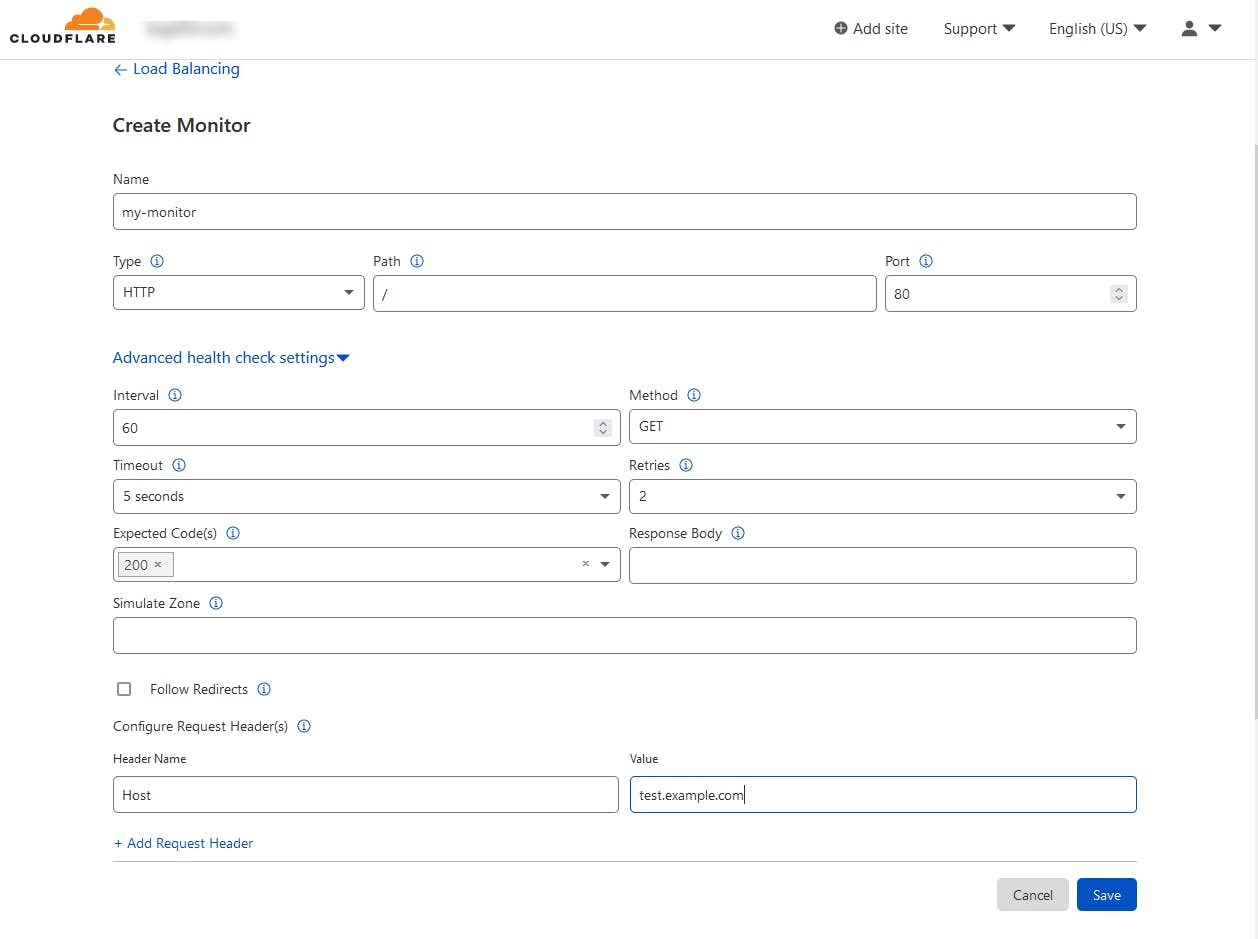
Next configure monitors (health checks)
On traffic steering leave it off.
You don't need custom rules neither
Review and create your loadbalancer
That's it, very simple.
It will create DNS records for the loadbalancer domains you select. If you create a * subdomain, more specific domain names takes precedence so you can still add some domain outside the loadbalancer if you wish.
I have setup this loadbancer in front of my ingress kubernetes machines, which use an fixed host port and it works great with cache and low latency.
For more information check the documentation